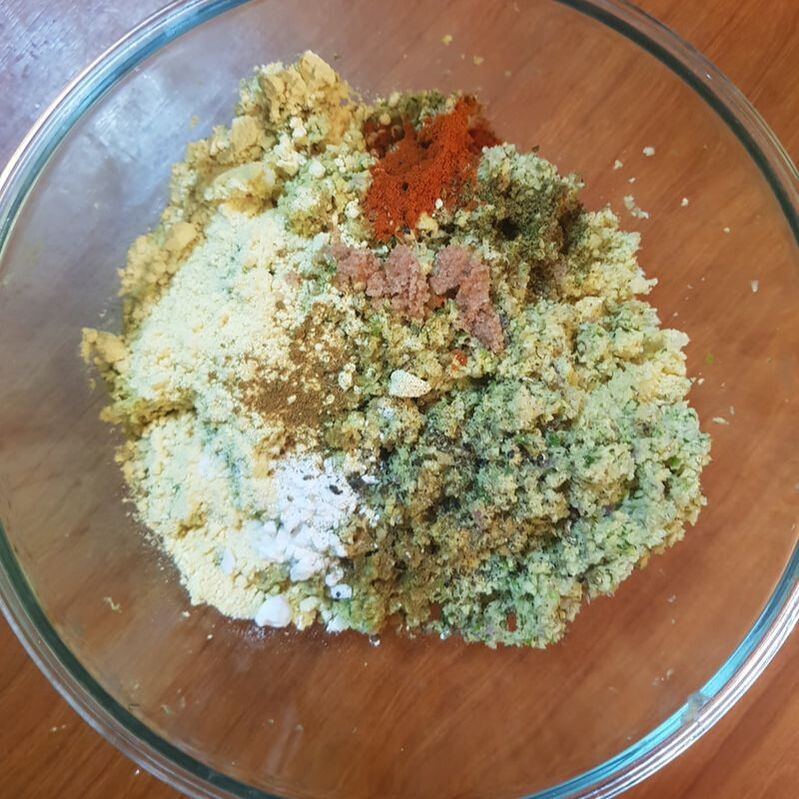
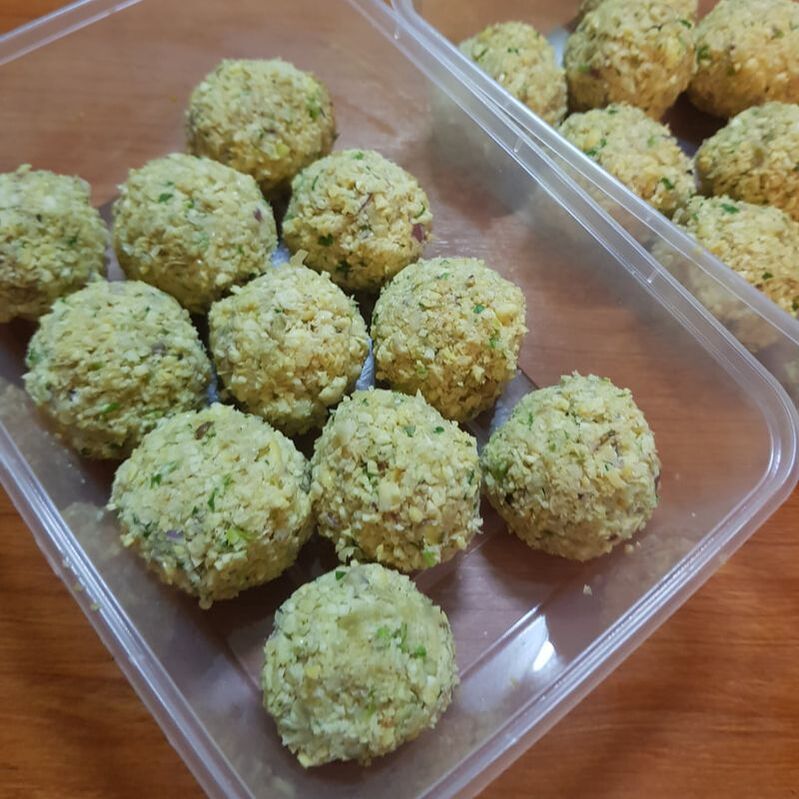
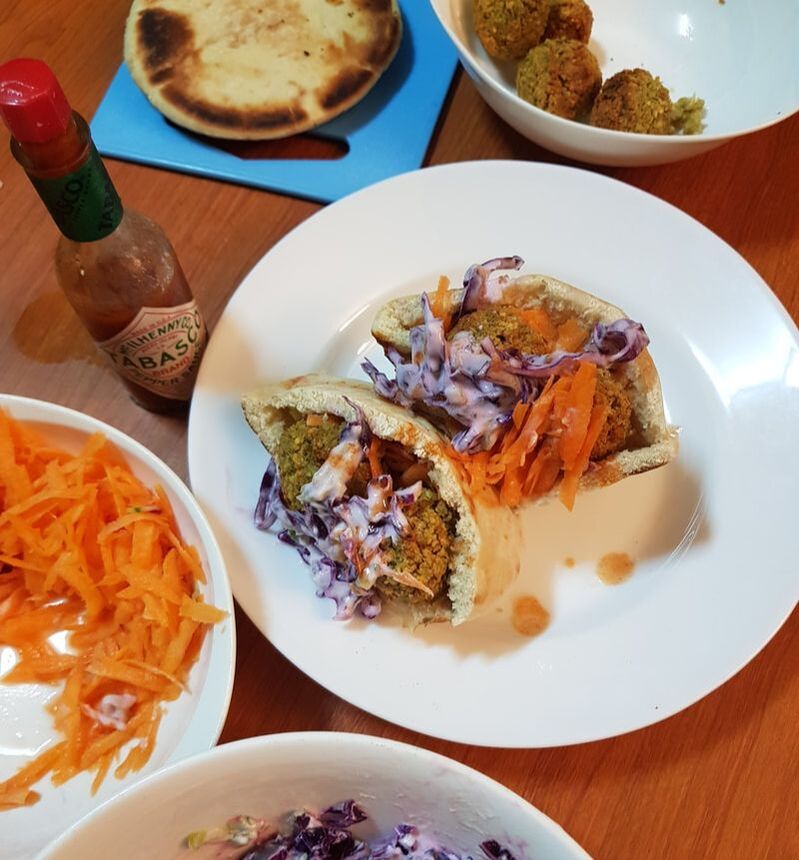
 I have 2 very fond memories when I think about falafels. The first one was in Paris, when I was on my leap-of-faith trip alone, and someone had told me about this falafel joint that Lenny Krevitz goes to (and by God, if it's good enough for Lenny, it's good enough for the rest of us!). It was a falafel wrap, hot crispy green balls stuffed in soft peta, with some pickled veg, a slather of yoghurt and hot sauce... it was better than most dates I've ever had. The second memory is in Jordan, a small falafel shop in Wadi Musa near Petra, and they sold hot, fresh-from-the-fryer falafels in brown paper bags, to be eaten as a snack as you walk around. They were extremely addictive, and I went to that shop twice under 12 hours. I've tried making falafels a few times, but to no avail. But hey, 16th time is the charm, they say! This recipe will get you a for-sure crispy falafel that is soft on the inside, and wouldn't break into a zillion pieces when you fry/air-fry them, like you heart can sometimes be. What You Need: Dried chickpeas (not canned, not cooked, DRIED) 1 handful parsley 1 handful coriander 1 red onion, peeled 4 cloves garlic, peeled 1 tsp ground cumin 1 tsp cayenne pepper 1/2 tsp black pepper powder 2 tbsp flour 1/4 tsp bicarb soda 1/4 baking powder What You Do: 1. First of all, let's talk about the chickpeas. The main cause of failure in my past falafel-making endeavors was due to getting the chickpeas wrong. You can't use cooked or can chickpeas because they have too much water, and will therefore cause your falafels to be soggy, and they will never have the crispy gritty exterior you're looking for when you cook them. So what you need are dried chickpeas and you soak them in cold water for about 6 hours, until they double up in size. This is the correct base for falafels. 2. Drain the chickpeas, and put them in you food processor. Put all the other ingredients into the processor, season with salt (if your machine is small, you can always do this in batches and mix them all together in a large bowl), and blitz. What you're looking for is for the chickpeas to get the texture the size of cooked cous cous (kinda grainy, and not very fine). 3. From this mix, form balls slightly smaller than golf balls. If the mix doesn't seem to stick together, blitz for a few more seconds. 4. For storage, you can keep these falafels in a single layer in your Tupperware, and they will keep in your freezer for months. 5. To cook, you can either shallow fry them in a flat, non-stick pan with a little oil, or air-fry them, 180 degrees for around 20 minutes, or until golden and crispy. 6. Eat them hot! Best as just a snack with your favorite condiment, or stuff into some pita bread with some coleslaw.
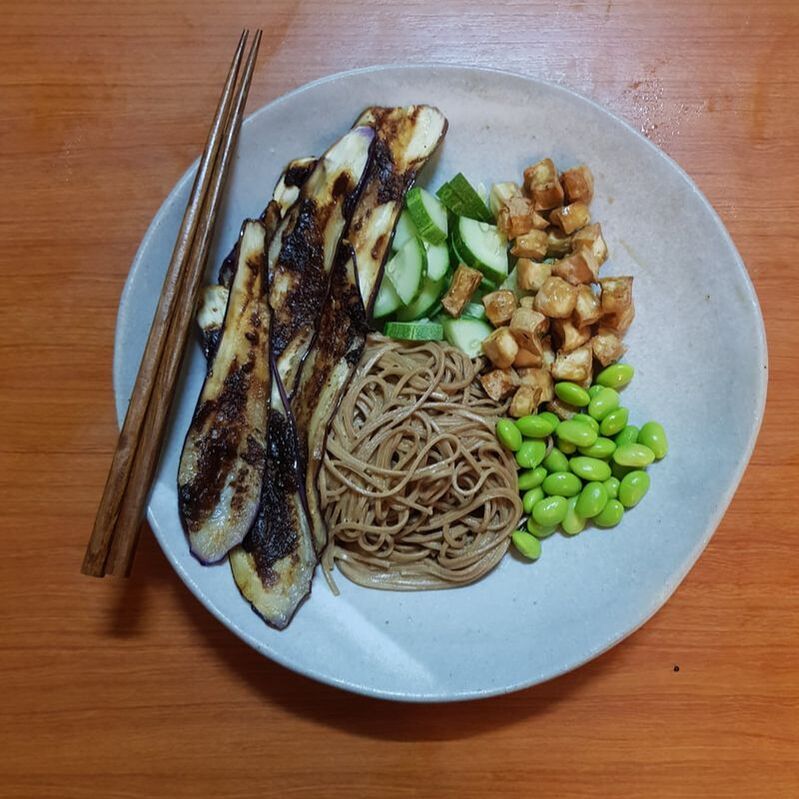 Miso: an ingredient unheard of at grocery stores until recently, and now you can even buy tubs of them online! Miso is basically a type of fermented soy, used widely in Japanese cooking. What it brings is a distinct umami flavour, like a deeper, saltier thickened soy sauce variation. Interested yet? Great! Eggplants are great in carrying miso flavour, as they are a sturdy, meaty vegetable, and hold well against a heavy slathering of miso. And then, we grill them until they are charred and almost blackened, and what you'll get is the silky texture of softened eggplant, with a healthy slap of salty, savoury goodness... Anyway. A compliment to this would then be a portion of springy soba noodles drenched in a creamy sesame sauce, and to offset these textures, some cripsy, air-fried tofu, some edamame, and crunchy, fresh cucumber. Gosh. I love it when healthy stuff doesn't compromise deliciousness. If you need some fire, you can also sprinkle some chopped chilies in this dish. This recipe makes 1 serving. What You Need: 1 long eggplant, sliced into 0.5cm long 1 tbsp miso paste, any variety 1 tbsp olive oil 1 handful soba noodles (more or less. consider a single portion) 1 handful edamame beans, boiled, shelled 1 handful diced cucumber Optional: Sesame seeds, chopped chili, to top dish For the soba dressing; 1 tbsp tahini 2 tbsp olive oil 1 tbsp vinegar (I prefer balsamic) 1 small clove garlic, grated What You Do: 1. Put a grill on high heat. 2. Add miso with olive oil so that it become a runnier paste, and slather one side of the sliced eggplant only. Put the eggplant onto the grill, miso-side up. 3. Cube your tofu, pop them in the air fryer for about 20 mins, 200 deg, or until browned and crsipy. If you don't have an air fryer, shallow fry them in a small pan to get similar results. 4. Meanwhile, prepare the soba dressing. Adjust the ingredients according to taste. You're looking for a creamy and seasoned taste. 5. Boil a pot of water, and pop in your soba noodles. These noodles take very little time to cook, usually around 4-5 mins. Taste it as you go along, make sure it's not overly soggy. Drain. Pour dressing. Toss. 6. After about 5 mins on the grill, flip the eggplant over. Slather this surface with the rest of the miso paste. You may turn them over a few times, and the goal is to get the eggplant cooked, and the miso slightly darkened. They will look ugly. That's ok. They'll taste great though. 7. In a large plate, assemble the soba noodles, cucumber, tofu, edamame and grilled eggplant. 8. That's eat, really. Bon appetit :) 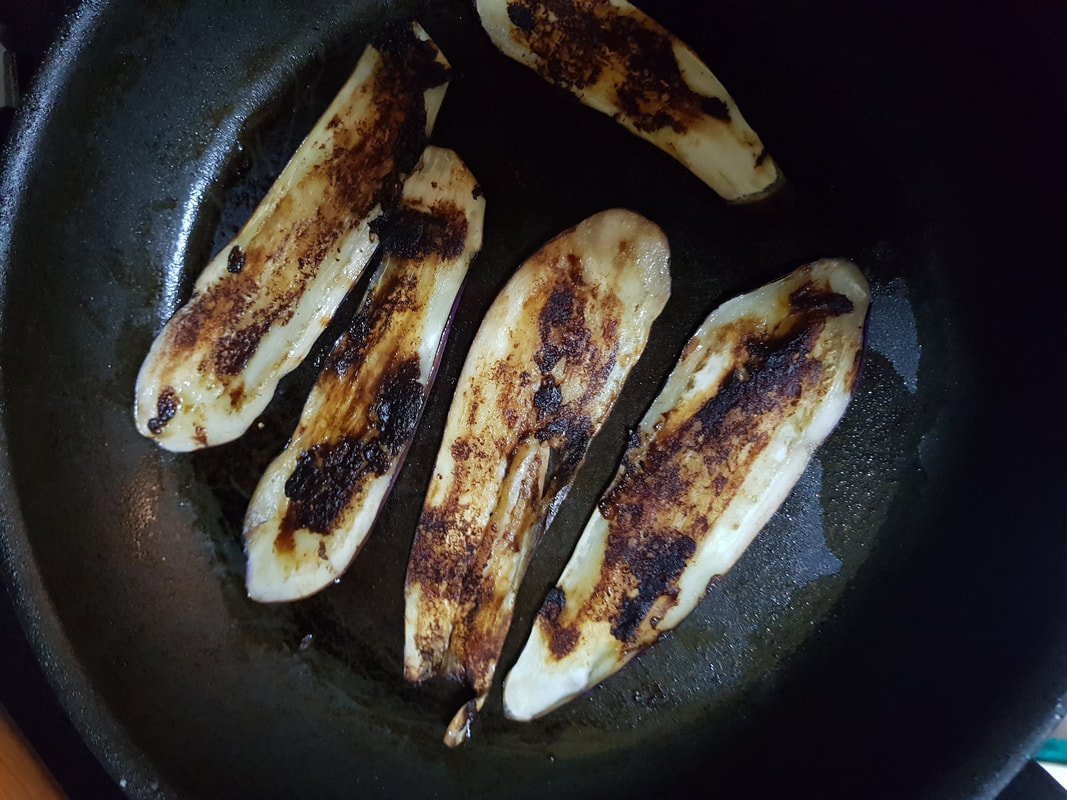 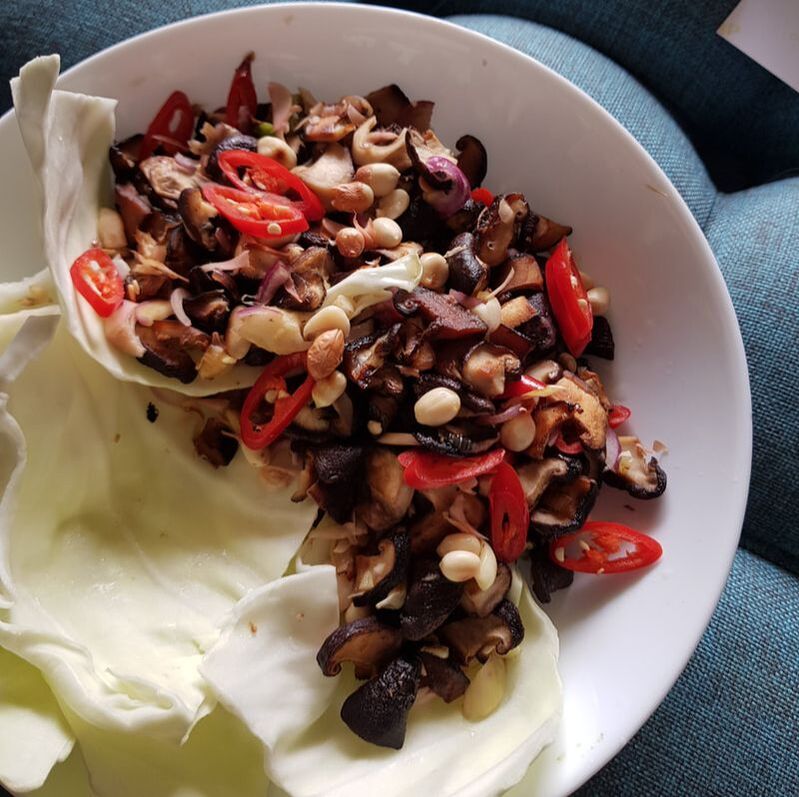 Thai larb is a meat salad variation. It's hot, sour, sharp, everything you'd expect from a rustic Thai dish.
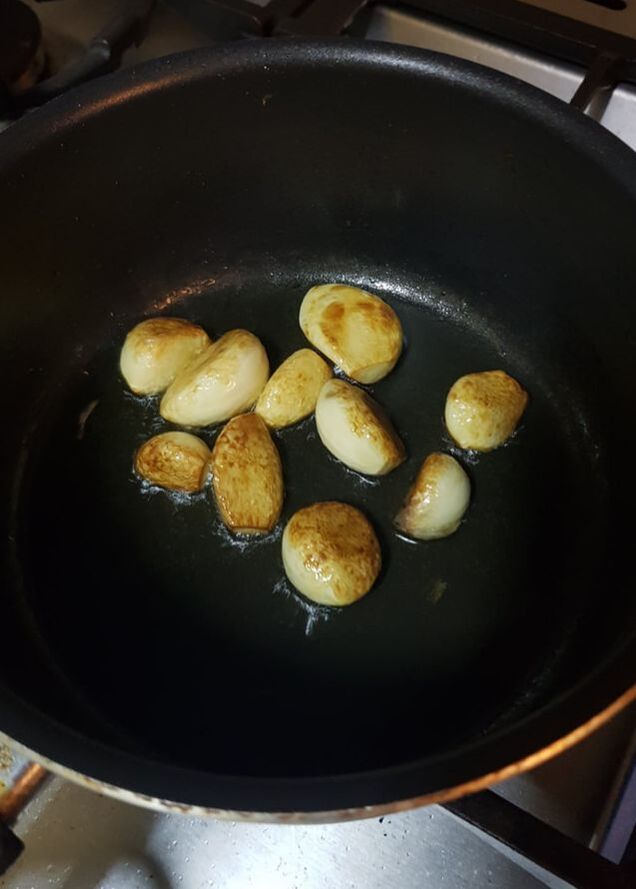
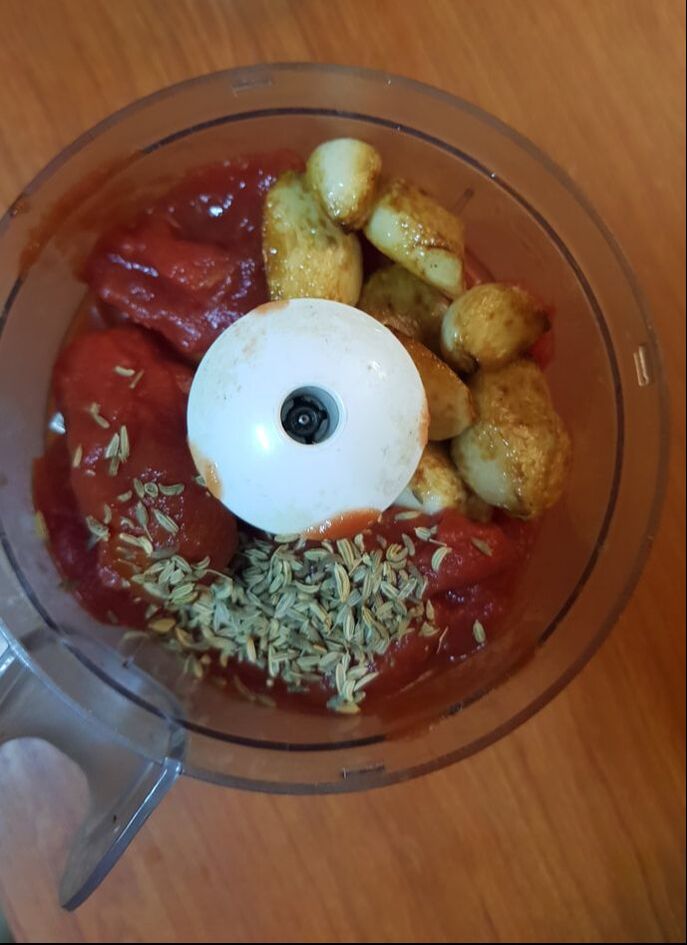
This one is a vegetarian version of a thai larb, using shitake mushrooms as the main ingredient instead. Using mushrooms ensures that the 'meaty' texture is still present, while of course, being a lot lighter. Shitake mushrooms are easy and cheap to find, and for this particular recipe, I'm using the fresh ones instead of dried. Shitake mushrooms are high in vit B5 (hello nice skin/hair!), selenium and zinc, and this meal, together with fresh herbs, peanuts, garlic, and ginger, can only mean good things for you. What You Need: 200 gms shitake mushrooms, cut into dice-sized pieces 1 big clove garlic, peeled and chopped 1/2 inch ginger, grated 1 red chili, sliced thin 1 torch ginger, thinly sliced Some mint or coriander, roughly torn 1 handful toasted peanuts 1 tbsp fish sauce Juice from 1/2 lime Lettuce or cabbage What You Do: 1. Before starting to cook, it helps to get all the ingredients prepped and ready, because this will be fast cooking over fire. 2. In a large flat bottomed pan on low heat, add 2 tbsp cooking oil. Add diced mushrooms, and cook for 4 mins. 3. Add chopped garlic and grated ginger, and half the chili. Toss and cook for a further 2 minutes. 4. Turn off gas. Add the torch ginger, half the peanuts, fish sauce and lime juice. Taste. Adjust according to your tastes. You're looking for a balance of heat, saltiness and sourness. 5. Transfer to a plate, over some cabbage or lettuce leaves. Sprinkle the rest of the chili, peanuts and coriander/mint if using. 6. How to eat: Great on its own in the cabbage/lettuce leaf 'cups' (great for when you're trying to eat healthier!), or as a dish for your rice. 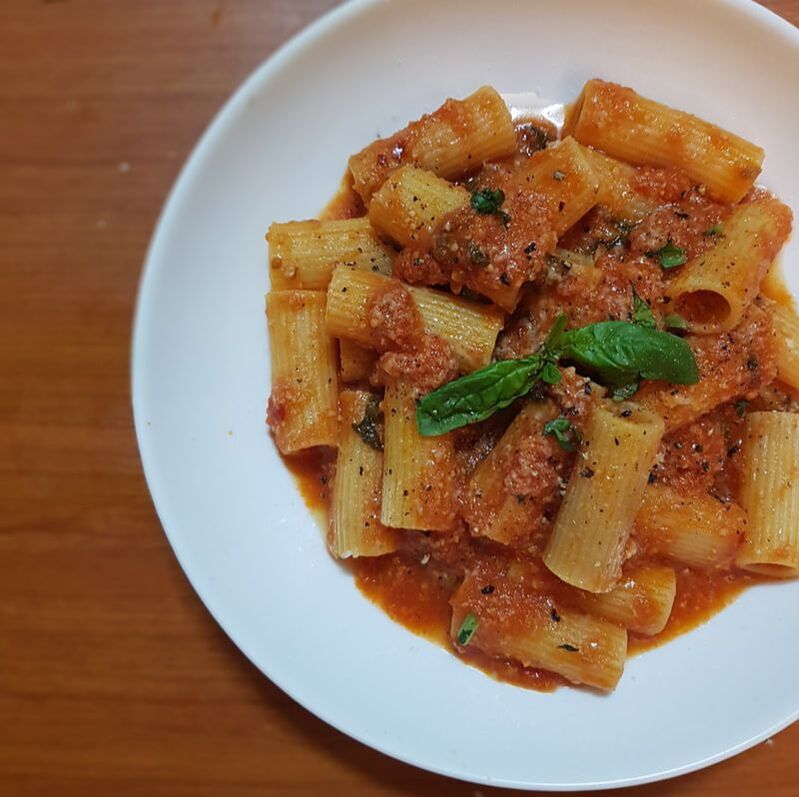 Here's how garlicky this pasta is: you'll need 12 cloves of garlic. Big, fat, 12 cloves of garlic. This particular pasta sauce recipe is extremely smooth, almost like a garlicky, slightly spicy tomato puree smothering some pasta. You can easily make double batches, and freeze them (it almost seems like most of the recipes in here are freezable ones these days, but that's how I roll). What I like about this arabiatta recipe is that it elevates the basic pomodoro you're used to, with hints of fragrant fennel seeds, specks of garlic in the sauce, and a hint of chili flakes. You can use any pasta you like, but I find that rigatoni or penne works best, as the smooth sauce fills in the pasta holes really well. This one is definitely a pasta recipe to place in your repertoire of "I'm lazy but I still want a nice, warm dinner" category. This recipe makes 2 bowls of pasta. What You Need: 12 cloves of garlic, peeled 1 can of whole tomatoes 1 tsp fennel seeds 1/2 tsp chili flakes 1 small handful fresh basil, chopped Dried rigatoni/penne pasta What You Do: 1. In a large pot filled with salted water, bring to boil. Add in pasta and cook according to packet instructions (about 5-7 mins). 2. In a large pan, add 3 tbsp extra virgil olive oil. Add the whole garlic. Start the heat on low. Slowly cooked the garlic until they become yellow (don't let them burn!). 3. Remove the garlic into a food processor. Add the canned tomatoes, fennel, and chili flakes. Whiz until smooth. 4. In the same pan with the olive oil, add this processed puree mixture. Season with salt and pepper, add the basil. Cook under low fire for about 15 mins. 5. When the pasta is cooked, remove to plate, and scoop over the sauce. Finish with some shavings of parmesan, if you like. 6. If you intend to Instagram this plate, it looks better if the pasta is mixed with the sauce first.
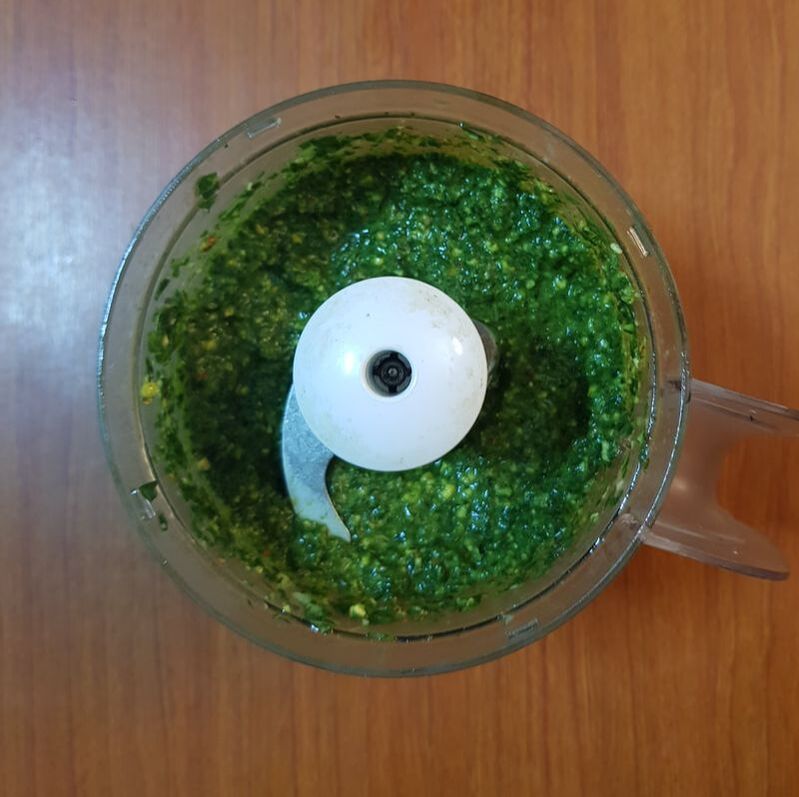 Pesto, otherwise known as the green thing you smother your pasta in, and has a woody, nutty taste, is a staple in Italian cuisine. You probably get them in jars at the fancy grocery store, or say stuff like "Ohhh I had them when I was in Rome with my now ex-husband!"
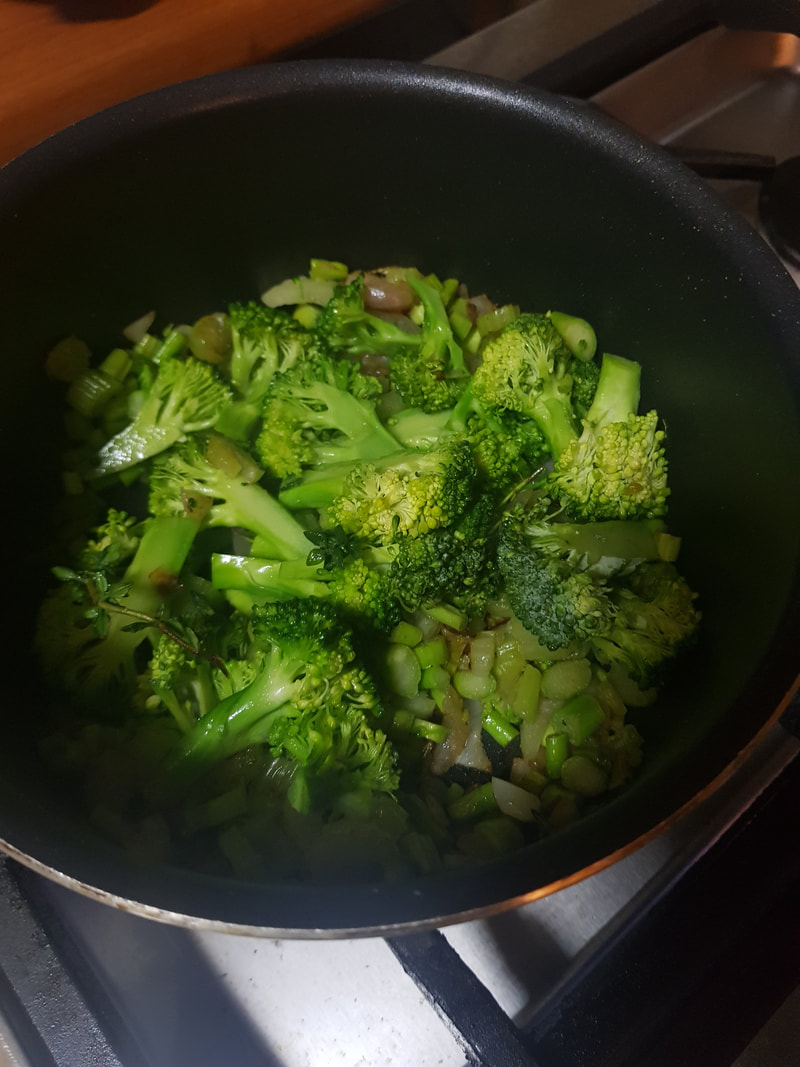
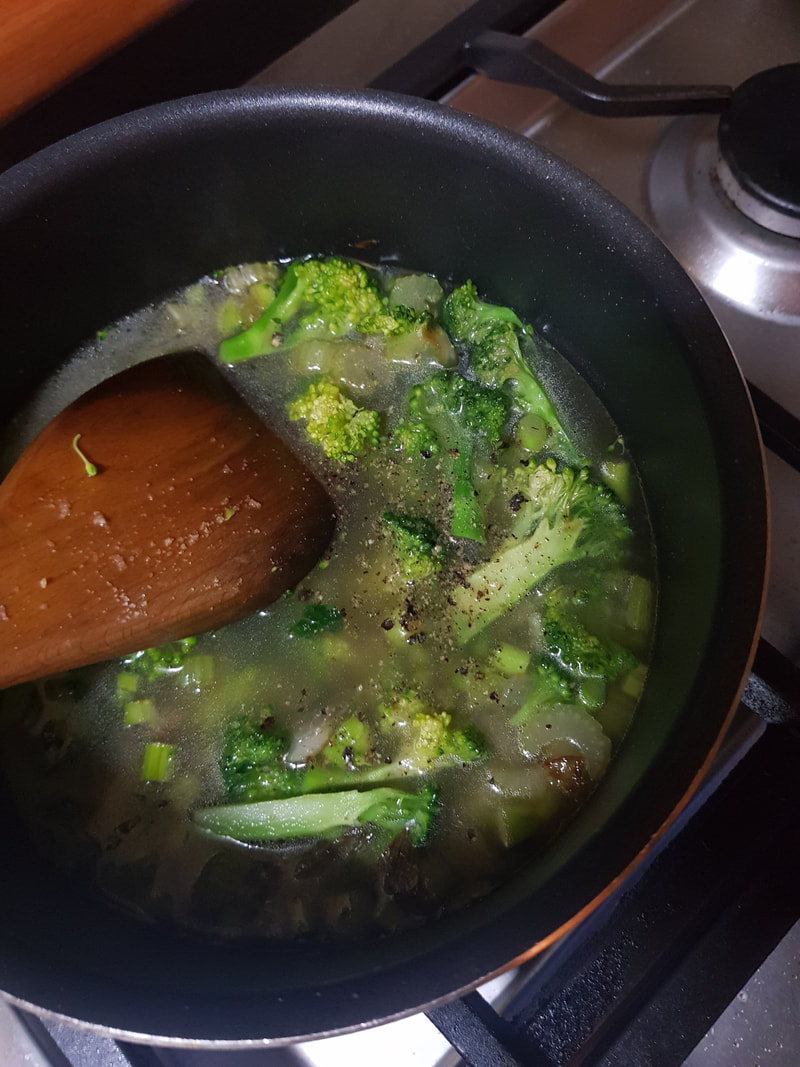
Well, guess what. You can make perfectly decent, fresh pesto at home, right here, in your (my) humid, SE Asian apartment. It takes 5 minutes, and tastes 5 times better than the ones in the jar at the Italian food section. You can even freeze them for future use. The traditional recipe uses pine nuts, and pine nuts are basically so freaking expensive here, and no one should be paying that much for some nuts. No one. So for this recipe, I'm recommending a much cheaper substitute - whole almonds. Once you have yourself a batch of fresh pesto, the possibilities are endless. Endless. Spread them onto your grilled cheese sandwiches. Toss some warm pasta with them. Slather a piece of roast chicken with them and think of yourself as Martha Stewart. Roast a pile of vegetables and toss them in the pesto, and you've got yourself an elevated roast veg tray. What You Need: 100 grams fresh basil 1 clove garlic, peeled 1 handful almonds, roasted or not roasted 1 tbsp. lemon juice 3 tbsp. extra virgin olive oil 1/2 tsp salt 2 tbsp grated parmesan What You Do: 1. There is only one step here, to be honest. Dump all that stuff in your food processor, and blitz until smooth. If it's still chunky, add a small dash of water to get it going. 2. Store in a small jar, in the fridge, or freezer. In the fridge, it keeps until 4-5 days.  I hate it when I buy asparagus, and the next thing I know I could only use half of it, because the lower half isn't tender enough to grill or eat right away. It's wasteful, and let's not mention how much asparagus cost in this side of the world. The basic idea of making soups stemmed from the need to use knobs and ends of produce lying around the house. Back in the day, soups are the solution to not waste anything - slow cooking something in a broth has the ability to soften and tenderize almost everything. So why not include asparagus ends? I love this broccoli and asparagus soup because it's easy to make, consists of 3 out of my 5 daily veggie requirement, and I can make a large batch to freeze. I am, in fact, a self-proclaimed frozen-soup-and-pasta-sauce lady. You don't want to make it vegan, you can use chicken stock instead of vegetable stock, and add a splash of cream at the end, too. What You Need: 3 large celery sticks, roughly chopped 1 onion, chopped 1 tsp garlic powder 3 springs of thyme leaves (dried will also be ok) 1 tsp cracked black pepper 200 grams asparagus, chopped (I always use the starchier ends!) 200 grams broccoli, cut into small florets 1 litre vegetable stock (you can use chicken stock too) What You Do: 1. In a large, heavy bottomed pot, heat 2 tbsp olive oil with medium heat. Add the celery and onion with a pinch of salt, and cook until transluscent. 2. Add garlic powder, black pepper and thyme, and stir until fragrant. Add the asparagus and cook for 2 mins. Add broccoli, and cook for another 3 mins. 3. Add the vegetable stock and bring to boil. Once it boils, lower the heat and simmer for 10 mins. Then set aside to cool. 4. Once it has cooled anough for you to manage, pour it into a blender (maybe in batches, if you dont want splutter), and whizz until smooth. 5. To serve, it's great just as is, or you can add some croutons, another drizzle of extra virgin olive oil and some cracked black pepper on top. 6. If you plan to freeze some, it can last up to a month in the freezer.
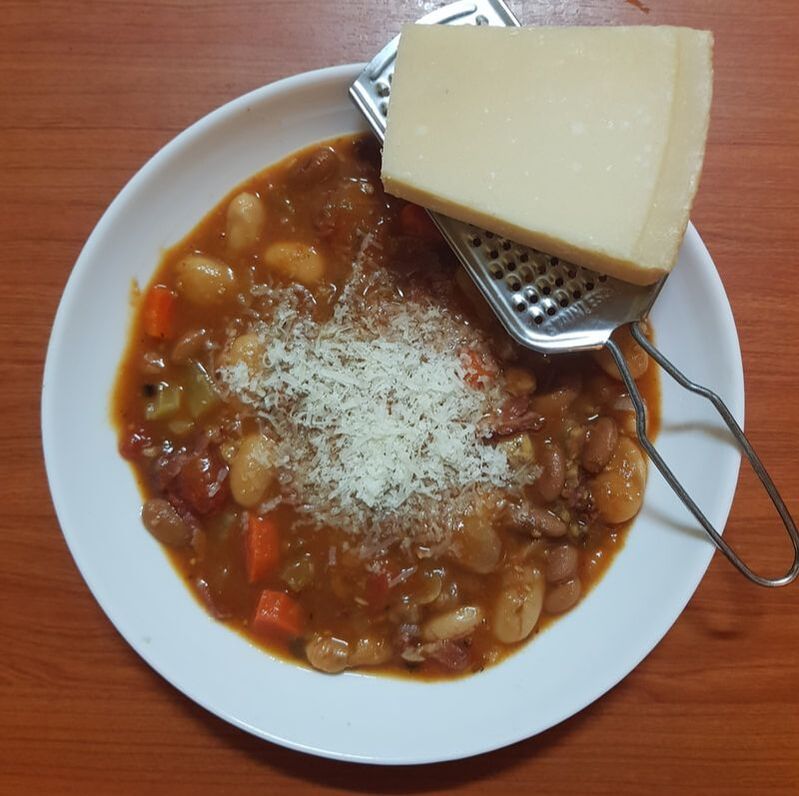 Oh the soup life. Soups are great for when the nights are rainy, when the day has been shite and you need a hug-in-a-bowl, when you're not feeling well, or when you'r trying to lose a few pounds. Soups are soothing in general, but what makes this minestrone a winner is that it's a whole meal on its own, so you can make it in a large singular pot and you've got a whole meal sorted out. It's filled with vegetables and beans for protein, and if you make extra, you can freeze them in batches, and use them later to drench chicken meatballs in, or even add a handful of pasta as you reheat it. When you make a recipe as simple as soup, the key is to rely on the spices and herbs for depth of flavor. This is especially important when making vegetarian meals, since you no longer have the factor of animal fat for taste. Here's a recipe that I've used plenty of times, and the beauty of this is that you can feel free to add any extra sturdy vegetables you've got stashed in your fridge that needs using. What You Need: Olive oil Small pinch fennel seeds Small pinch coriander seeds Small pinch mustard seeds Small pinch of dried herbs you have on hand like thyme, rosemary or oregano 1 tsp garlic powder 1 tsp crushed black pepper 1 carrot, peeled and roughly chopped 2 celery sticks, roughly sliced 1 whole white onion, roughly chopped 2 cans whole peeled tomatoes 1 cube vegetable stock 1 can butter beans Optional - kale, or sugarnap peas, or chopped capsicum What You Do: 1. In a large heavy-bottomed pot (so that stuff don't burn too quickly), heat about 3 tbsp of olive oil with low heat. Add the fennel seeds, mustard seeds and coriander seeds as the oil begins to get hot. Listen up for the sizzle. 2. Add the chopped carrots, onions,celery, crushed pepper and garlic powder. Cook them low and slow until they soften, and make sure they don't burn. This will be the base for the soup, giving the entire dish natural sweetness and texture. 3. After about 3-5 mins, add the canned tomatoes. Crush them with the back of your wooden spoon. Refill a can with water and add to the soup. Throw in the vegetable cube too, making sure it is well dissolved. 4. Cook until it comes to the boil, then taste. Add and adjust with salt to your liking. 5. Drain the butter beans and add to the soup. Simmer over low heat for at least 20 mins, or until everything is all mixed and cooked together. 6. If you want to add some extra vegetables, do that in the final 5 mins. 7. To serve, ladle soup into bowls, and drizzle some olive oil. For extra pezzaz, you can also grate some parmesan cheese on top (you know what else go super great with this? Crumbled feta cheese). 8. For freezing - store in containers, and after you've reheated it, rejuvenate with a drizzle of olive oil, some crushed pepper, and a squeeze of lemon juice. 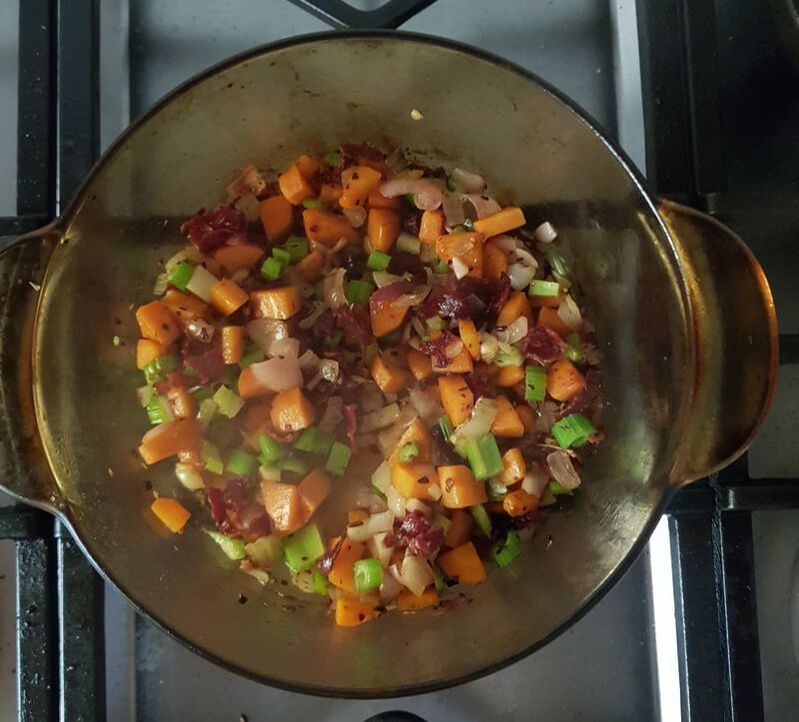  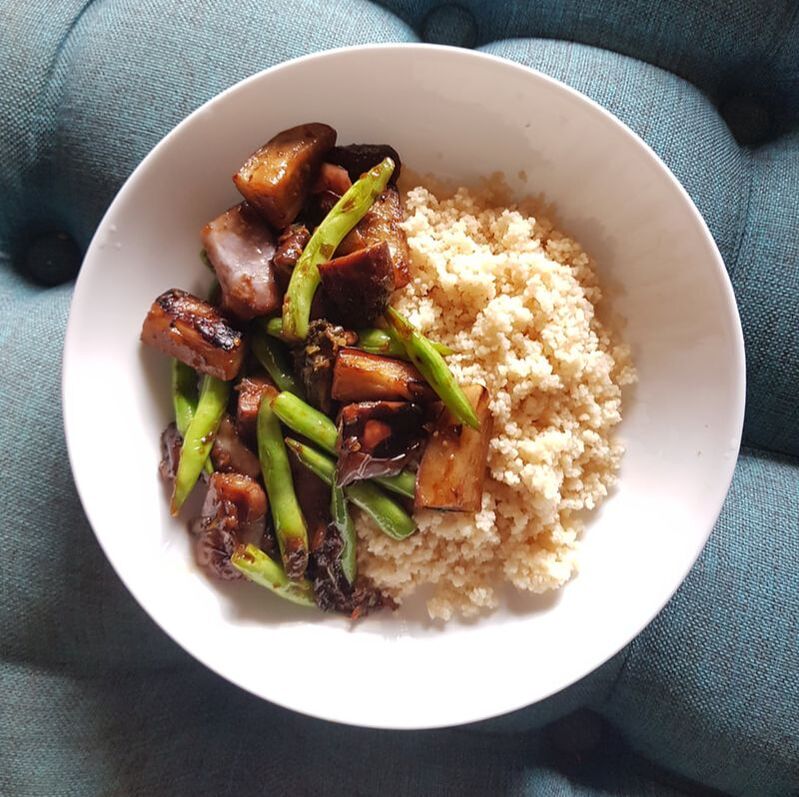 Pad kra pow is a popular streetside dish from Thailand, commonly made with minced chicken, served with rice, and an egg. But made correctly, a vegetarian version of this can be just as fulfilling yet healthier. The trick? To use substantial vegetables, such as eggplants, mushrooms or even cubed tofu. But otherwise, feel free to use any type of vegetable that can stand a stir fry on high heat.
Why cous cous? Because it's the kind of dish I like to whip up for lunch, and when it comes to lunch I want things speedy, speedy, speedy. Cous cous only require a quick 10-minute steaming with hot water. Plus, it has lower calories and higher protein than brown rice. So it's a win for everyone! Before you begin to cook, get everything ready and in order, because the cooking takes a shorter time than you putting on your pants (don't lie, you're always lingering in the mornings), and you don't want to burn anything. This recipe makes 2 servings. What You Need: 3 cups eggplants, cut into 1-2 inch pieces 1 cup green beans, cut into 2 inch pieces 2 cups fresh shitake mushrooms, quartered 4 cloves garlic 5 birds eye chilis, or more if you like em spicy 1 tbsp oyster sauce 1 tbsp light soy sauce 1 tbsp fish sauce 1 tsp thick soy sauce 1/2 cup cous cous What You Do: 1. First, let's make the cous cous. The ratio is always equal amounts of hot boiling water to cous cous. Place the cous cous in a bowl, add 1/2 cup boiling water (use a kettle), and cover the bowl with a plate to let it steam. Get a grill, or a flat frying pan, smoking hot. Toss the eggplants in a liitle oil (1 tbsp), and grill them on high heat, until cooked through, and slightly charred. 2. Meanwhile, using a pestle and mortar, pound the garlic and bird's eye chilis 3. Get your wok on high heat. Add 1 tbsp oil, and sautee the garlic and chili paste until it's fragrant. 4. Add the green beans and mushrooms and stir fry until cooked. 5. Add the eggplants. Pour in the sauces. Add some water if you want a runnier sauce. 6. Fluff the cous cous up with a fork, serve them up on platters, and add the stir fry on top of by the side. 7. Behold, your 15 minute healthy, speedy lunch.  Easy to make. Easy on the stomach (kimchi = natural probiotics). Also, if you're a fan of savoury breakfasts, this will give you the right amount of kick you need.
This recipe makes 1 serving. What You Need: 2 large eggs 3 tbsp kimchi, roughly chopped Some feta cheese What You Do: 1. Crack the eggs. I omit the salt because the feta cheese and kimchi are already salty. Beat them with a fork. 2. In a large flat pan, heat 1 tbsp olive oil. Add the roughly chopped kimchi, warming them up. 3. Push the kimchi to one half of the pan, and add the eggs gently. What you're trying to do is to create half side of the egg with kimchi, and the other half without. 4. Crumble the feta cheese around, and as the egg set, turn off the heat. Gently fold the the egg, kimchi side down. 5. Serve warm. Best complimented with a hot beverage. 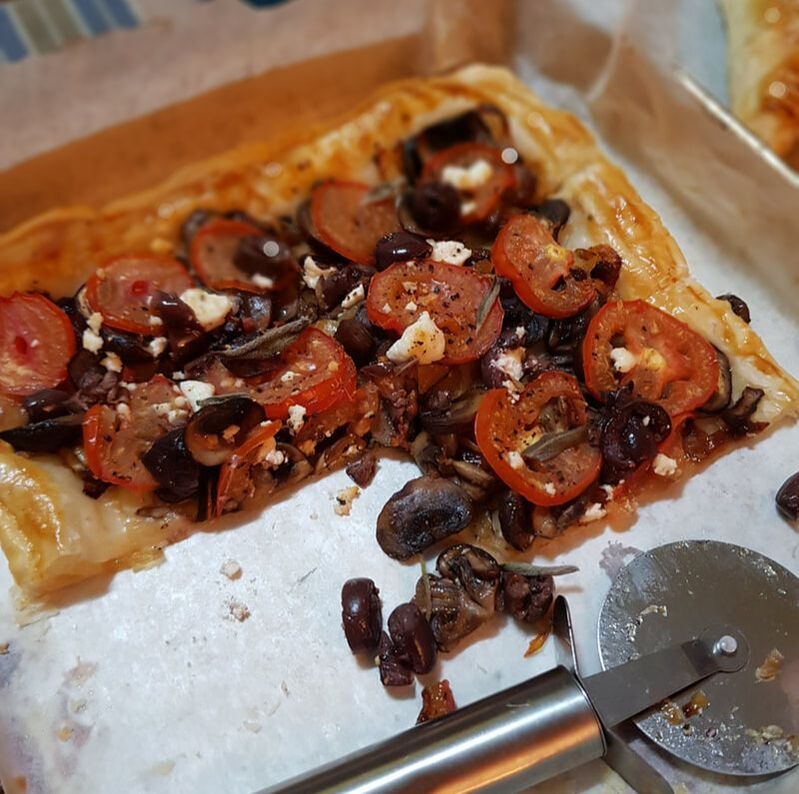 Another vegetarian recipe that's really not even a recipe - it's an assembly job. The key to 'assemblying' stuff to make one perfect food is to know how to marry things well into a perfect flavor combo, like this tomato, mushroom and olive tart. Once you get the hang of it, you can exchange and swap the toppings with whatever floats your boat; even some slice of cooked meat/chicken will be perfect.
This one is strictly vegetarian, though. Think meaty mushrooms, sweet caramelised tomatoes, salty olives and a burst of feta cheese here and there. I would highly recommend using caramelised onions as well, but if you're too lazy to care, it's okay. It will still be fabulous. This will make for perfect tea, or served with a large salad, a filling dinner. What You Need: 1 large square frozen puff pastry (I like the Pampas brand) 1 handful cherry tomatoes, halved 6-10 swiss brown mushrooms, sliced 5-6 black olives, pitted and sliced Some feta cheese Optional - caramelised onions (optional, but such a great addition), some beaten egg as eggwash, some sage or rosemary leaves What You Do: 1, Preheat oven at 180 degrees for 20 mins. 2. Lay your puff pastry in a baking tray lined with baking paper. Make sure the pastry is at room temperature. 3. In a large bowl, toss the tomatoes and mushrooms with salt, pepper, and olive oil. 4. You will put the toppings on the puff pastry, but make sure to leave a 1-inch border around it. If you have the caramelised onions, spread it out on top of the pastry first as a base. 5. Arrange the mushrooms and tomatoes on the pastry. Make sure they are evenly distributed. Make sure the tomatoes are cut-side up, so that the juices doesn't flow right onto the pastry and make everything soggy. 6. Sprinkle the sliced olives. Finish with a dash of cracked black pepper over it, and crumble the feta cheese on top of everything. If you have the sage/rosemary leaves, sprinkle on top. They will get nice and crispy. 7. Take a fork, and press the edges of the pastry to make nice lines and show that you're an effortless pro. If you have an egg, egg wash the edges, although sometimes I don't even bother. 8. Into the over for about 20 mins, or until the edges are golden and the mushrooms look cooked. 9. Slice and devour. |