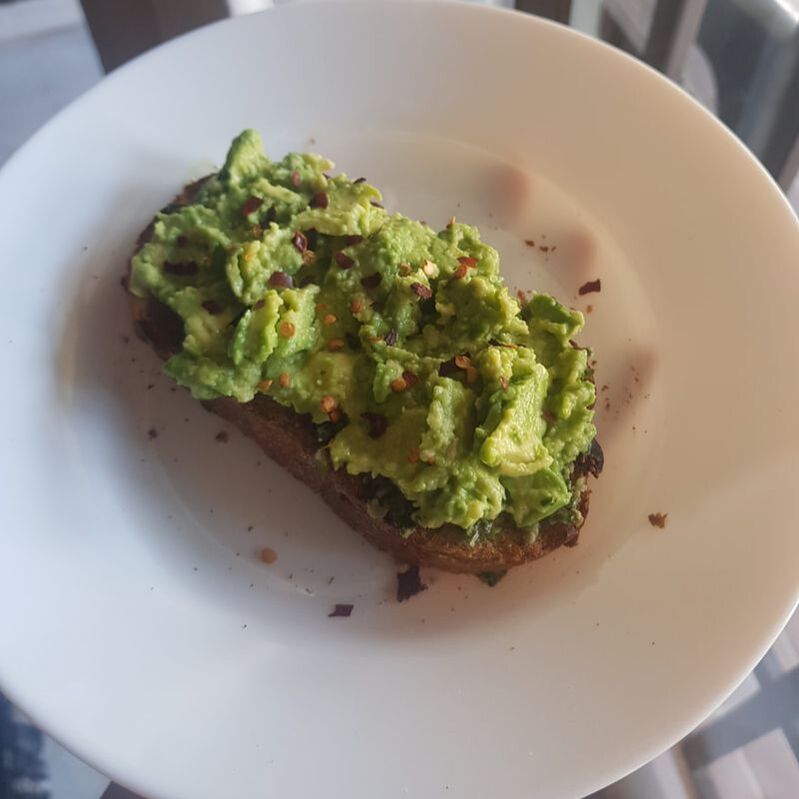
 The avo toast! You either love it or hate it, but if you love it, then this recipe might give you some ideas on how to take your normal avo toast up a notch. Although I like the simplicity of mashing the avo with a little salt just fine, some mornings I need a little bit of a kick (it's the Malaysian in me).
This is hardly a 'recipe', but merely an addition to the traditional avo toast assembly. What You Need: 1 ripe avocado 1/2 tsp grated fresh ginger 1/2 tbsp lemon juice Sea salt flakes Chili flakes What You Do: 1. Mash all of the ingredients, except the chili flakes together. 2. Spread on a piece of toast, and sprinkle the chili flakes, and a little bit more sea salt flakes. 3. Sometimes, I also enjoy a tiny drizzle of extra virgin olive oil in top. 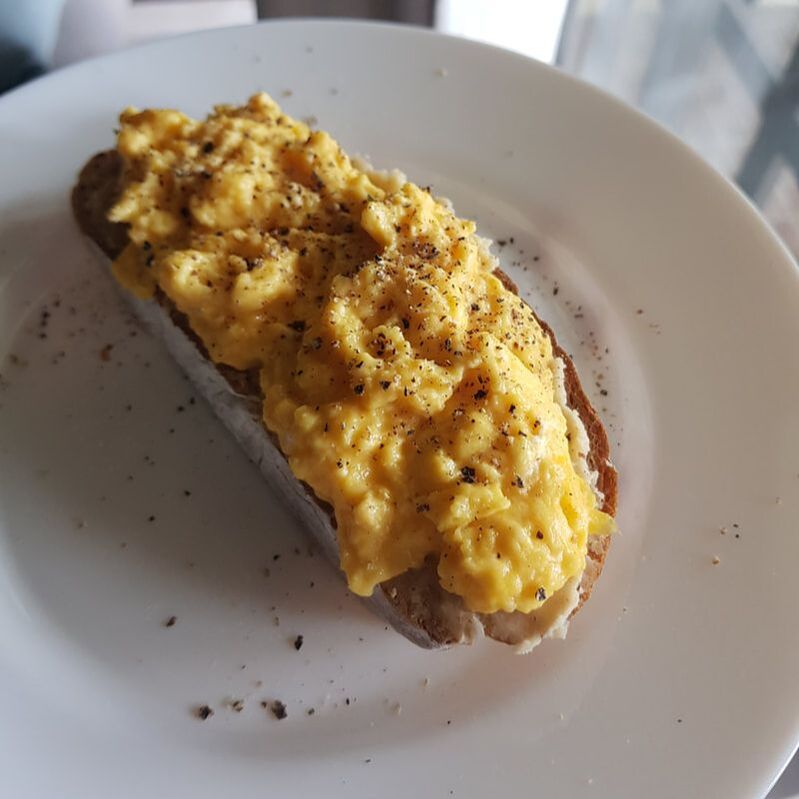 Imagine this: A thick, crusty, toasted piece of warm bread. On top of it, a dollop of creamy, buttery, silky scrambled eggs. Almost runny but not really, buttery curdles of eggs piled and topped with cracked black pepper.
There is an art to making the perfectly creamy scrambled eggs. My feelings are hurt when I go to a cafe and am served dry, overcooked scrambled eggs. It's easy to make at home, although for perfect results, you'll need the correct tools. The first, a small, non-stick pot. If it's too big, the heat will be too much and it will cook the eggs almost too immediately. If it's not non-stick, you'll lose a lot of the eggs stuck on the pot. Secondly, the heat trick. You need a low fire, and be prepared to remove the pot occasionally from the direct heat so that you don't cook the eggs too quickly. It's a relaxing act of slowly stirring the eggs until you get it slightly cooked, and removing it onto the toast while it is still runny - because yes, eggs will continue to cook even as they're sitting on that toast. What You Need: 2 eggs 4-5 dice-sized cubes of butter 1 tbsp fresh milk Salt Pepper 1 thick slice of sturdy bread, toasted to your liking What You Do: 1. In a bowl, whisk the eggs until the white and yolk are well mixed together. Add the butter cubes, salt and fresh milk. 2. Heat a small pot until it gets very, very hot. Once it does, pour in the eggs, and very quickly remove the pot from direct heat. Using a spatula, stir the eggs consistently, using the residual heat of the pot to slowly cook and curdle the eggs. 3. In a case where the pot seems to have cooled down too much and there is no more heat but the eggs are still too undercooked, place the pot over heat for a few seconds, while continuing to stir the eggs. 4. The eggs are done when they are still runny and slightly curdly. REMEMBER that the eggs will still continue to cook even on that toast. 5. Dollop the eggs onto your toast. Sprinkle over some cracked black pepper (freshly cracked black pepper makes all the difference, people). 6. Enjoy hot, with a cup of morning tea. 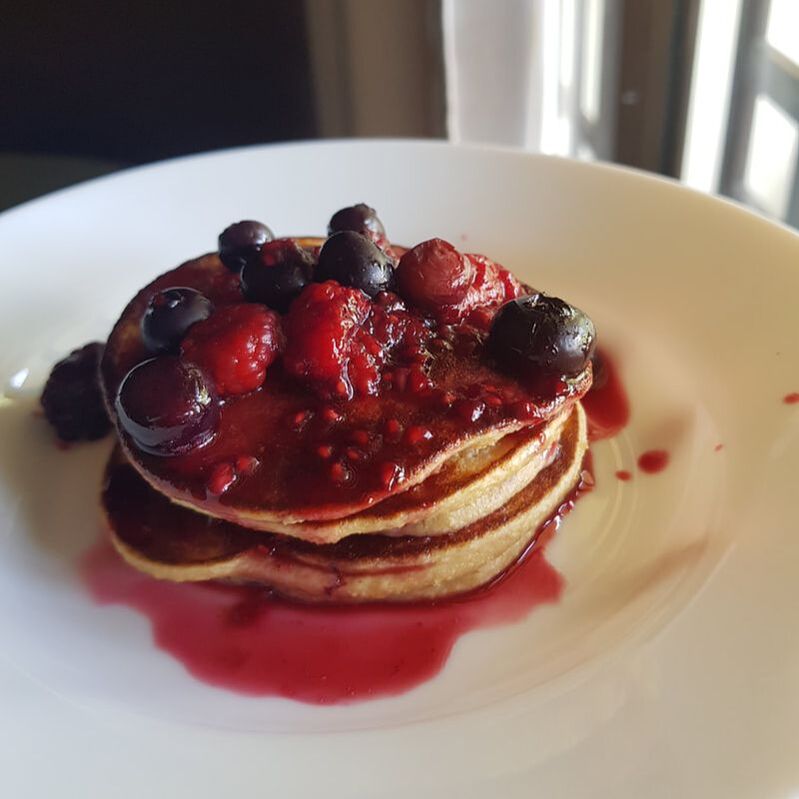 Pancakes, but make them healthy.
I love treats like pancakes on Sunday mornings especially, but sometimes a girl just needs to eat healthier, and this fulfills my pancake cravings without all that butter, white sugar, and white flour. This pancake only uses 3 main ingredients, and only requires a blender, which in many ways makes this a lot easier to do than traditional pancakes. If you're feeling extra, you can make the quick berry compote to eat them with, but otherwise, a dollop of peanut butter, or yoghurt, or plain maple syrup will do just fine. This recipe makes 1 stack of 3 small pancakes. What You Need: 1 ripe banana 1 large egg 4 tbsp quick/express oats Pinch of salt Optional (for the syrup); 1 handful frozen berries 1 tbsp maple syrup, or honey 2 tbsp water What You Do: 1. In a blender, whizz the banana, egg, oats and salt until you get a smooth batter. 2. Heat a large flat pan, with a tiny drizzle of oil. 3. Pour the batter into the pan to make 3 small pancakes. 4. Turn pancakes aftet 2 mins, or browned. 5. If making the quick compote, in a small, non-stick pot, heat the frozen berries, honey/maple syrup and water until you get a syrupy consistency, and pour on top of the stacked pancakes in your plate. 6. Enjoy without feeling an ounce of guilt. 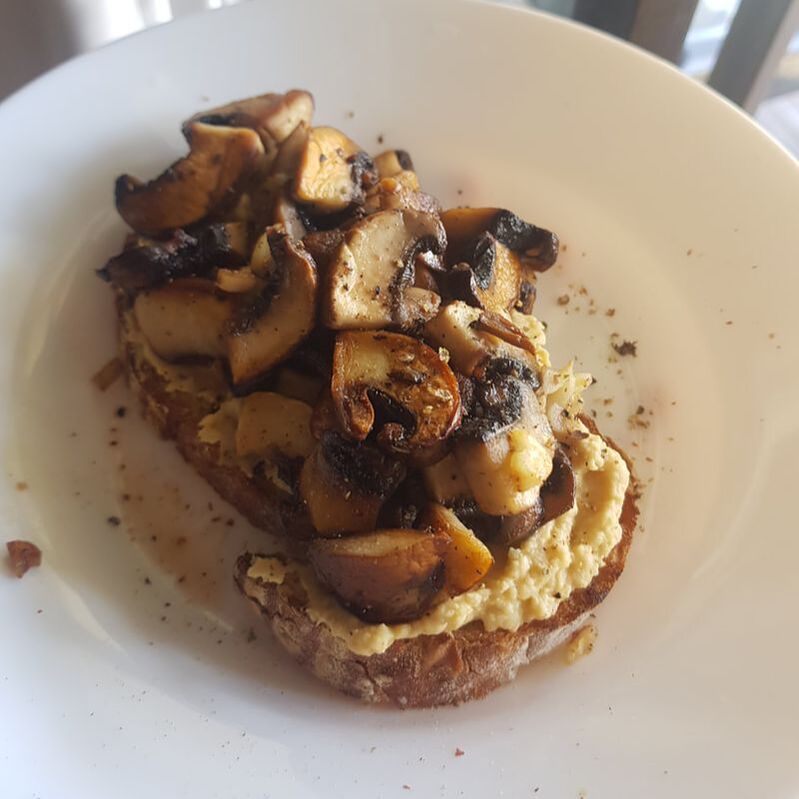 I love breakfast toasts! They are speedy and healthy and a great way to kickstart my day with a little bit of veg and good protein.
This particular version is very simple, yet also deeply savoury. Any bread will do, although I find that thick, crusty slices of sourdough or rye hold the topping well, and does not get too soggy too quickly. For the mushrooms, any type of your favourite mushrooms will do, although I prefer either oyster mushrooms and Portobello, as they have deeper flavour when browned. Note: When making simple toasts such as this, it's the little things that make a big difference. The freshly cracked black pepper. The toasted bread. The browned edges of the mushrooms when cooked. They make a load of difference in your toast experience. What You Need: Slices of bread (I prefer thick and crusty sourdough) 2 handfuls of mushrooms of your choice, cleaned and sliced to grill 1 large clove of garlic, chopped Some freshly cracked black pepper A pinch of dried thyme Hummus (buy, or get recipe HERE) What You Do: 1. Get your bread toasted before you start making the mushrooms. 2. In a large flat pan with low heat, heat 2 tbsp olive oil, and add the mushrooms. Season with salt. Leave them be, don't touch them for at least 2 mins to ensure good browning. 3. Add thyme, and chopped garlic. Stir mushrooms around and make sure the garlic doesn't burn. 4. With your toast, spread a thick, hefty amount of hummus on top. 5. Remove mushrooms from heat, top your toast with them, and sprinkle over the cracked black pepper. 6. Eat at a sunny spot. 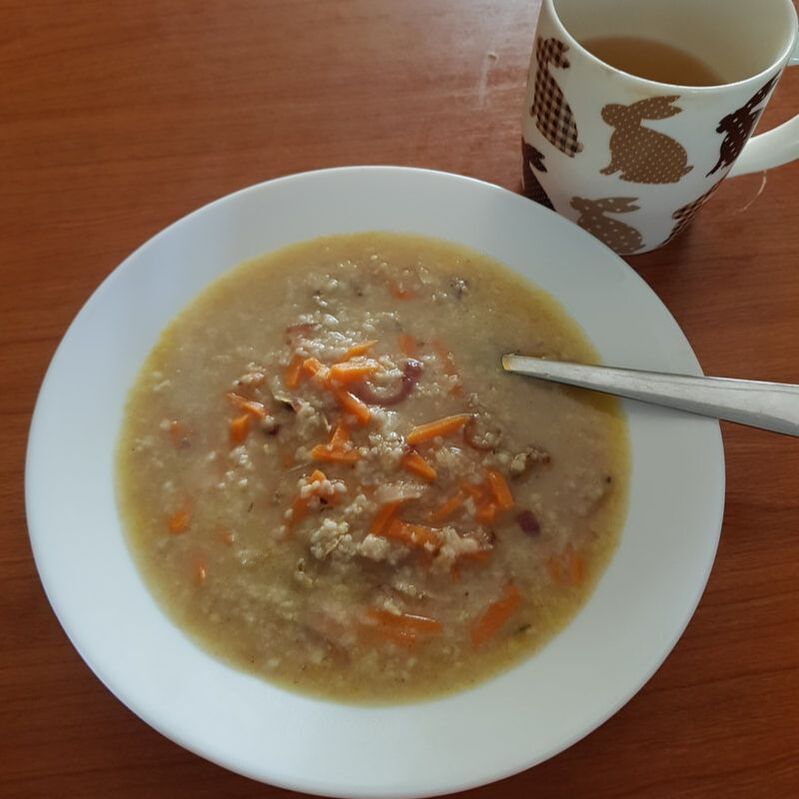 I loveee bubur lambuk (a Malaysian-specific rice porridge variation, most notably popular during Ramadhan). I love the sentimental feeling of having eaten it my whole life, and my father is a born-and-bred Kampung Baru resident, the birthplace of the most famous of all famous bubur lambuk.
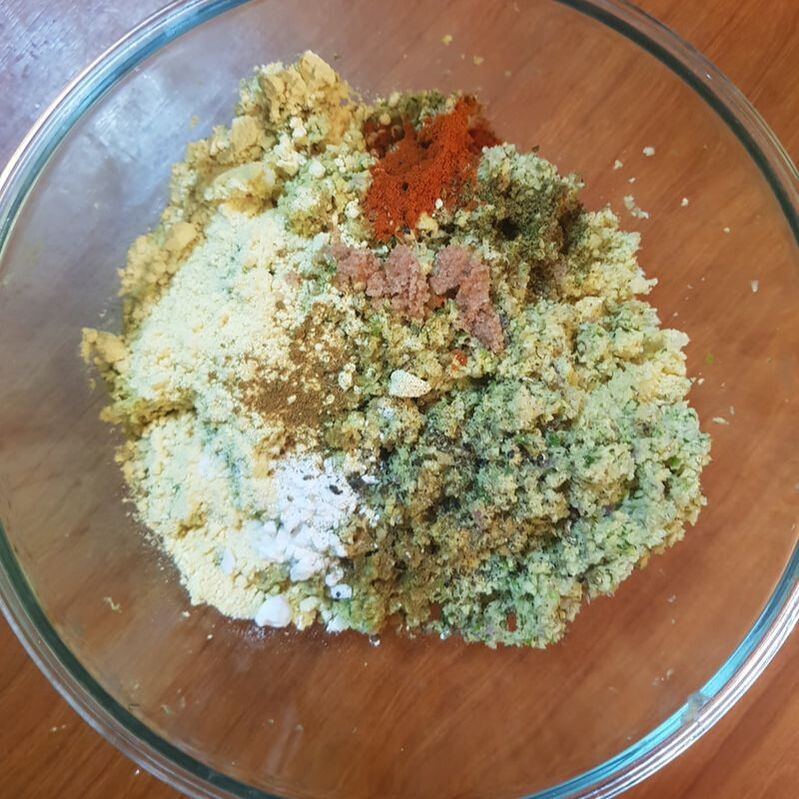
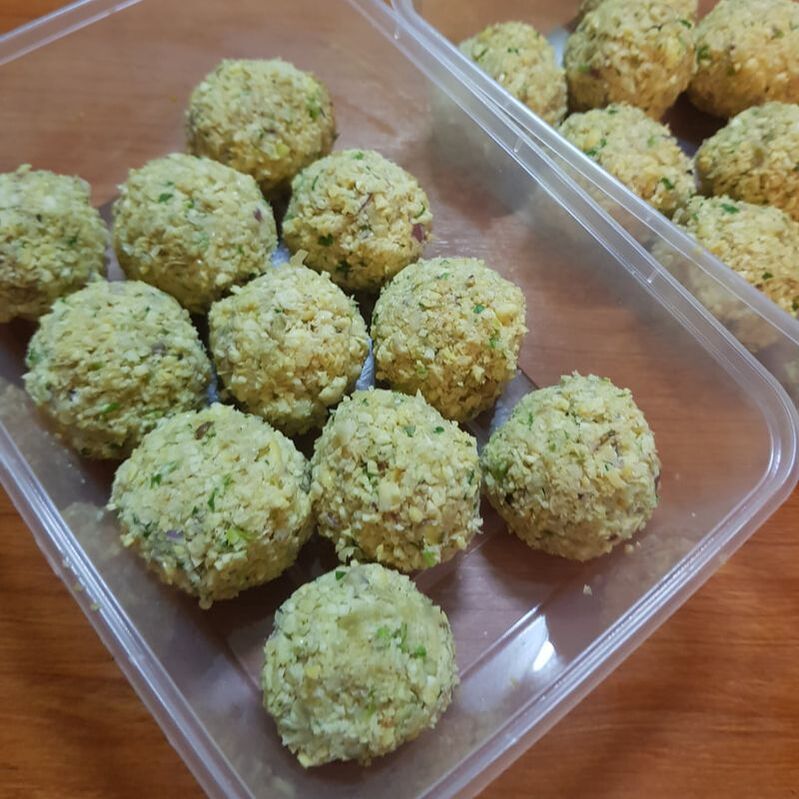
Unfortunately, like most rice porridge, it is also mainly just carbs and not much else. Which is great once in a while, but not so great if it's part of a staple menu. Enter my bubur lambuk-inspired oats. Unlike white rice, oats make a great substitute because it's a great source of fiber, and helps reduce cholesterol and sugar levels. Perfect for breakfast, or any quick meal of the day, really. I know what you're thinking - ewww! Savoury oats? Sounds gross. No, it is not. I promise. Try making it once, and I can almost guarantee that you'll be making it again. And again. And again. This recipe serves 2. What You Need: 1 medium shallot, peeled. chopped 2 cloves garlic, peeled, chopped 1/2 of a large carrot, peeled, julienned into thin, short strips 1 handful dried anchovies 1 tsp soup mix (I prefer Adabi's spice soup powder) 7 tbsp. quick oats 2 cups water Optional - Chopped spring onions, or fried garlic flakes for the topping What You Do: 1. In a small pot, with 2 tbsp vegetable oil, sautee the chopped shallot and garlic, until softened. 2. Add the carrot and anchovies, and cook until the vegetable is soft and the anchovies are cooked through. 3. Add your oats, the soup mix, water, and stir everything together. Quick oats take only a minute to be ready, so by the time everything is bubbling, you're good to go. Adjust water amount to whether you like your porridge runnier or thicker. 4. Serve hot, and if you're feeling fancy, with a topping of chopped spring onions or fried garlic flakes. 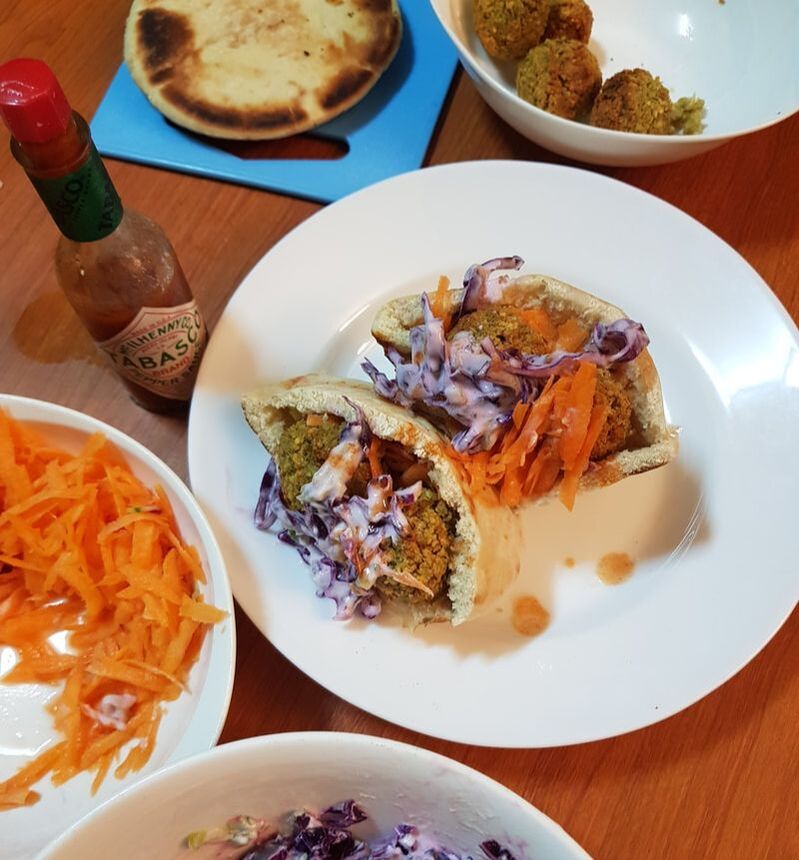 I have 2 very fond memories when I think about falafels. The first one was in Paris, when I was on my leap-of-faith trip alone, and someone had told me about this falafel joint that Lenny Krevitz goes to (and by God, if it's good enough for Lenny, it's good enough for the rest of us!). It was a falafel wrap, hot crispy green balls stuffed in soft peta, with some pickled veg, a slather of yoghurt and hot sauce... it was better than most dates I've ever had. The second memory is in Jordan, a small falafel shop in Wadi Musa near Petra, and they sold hot, fresh-from-the-fryer falafels in brown paper bags, to be eaten as a snack as you walk around. They were extremely addictive, and I went to that shop twice under 12 hours. I've tried making falafels a few times, but to no avail. But hey, 16th time is the charm, they say! This recipe will get you a for-sure crispy falafel that is soft on the inside, and wouldn't break into a zillion pieces when you fry/air-fry them, like you heart can sometimes be. What You Need: Dried chickpeas (not canned, not cooked, DRIED) 1 handful parsley 1 handful coriander 1 red onion, peeled 4 cloves garlic, peeled 1 tsp ground cumin 1 tsp cayenne pepper 1/2 tsp black pepper powder 2 tbsp flour 1/4 tsp bicarb soda 1/4 baking powder What You Do: 1. First of all, let's talk about the chickpeas. The main cause of failure in my past falafel-making endeavors was due to getting the chickpeas wrong. You can't use cooked or can chickpeas because they have too much water, and will therefore cause your falafels to be soggy, and they will never have the crispy gritty exterior you're looking for when you cook them. So what you need are dried chickpeas and you soak them in cold water for about 6 hours, until they double up in size. This is the correct base for falafels. 2. Drain the chickpeas, and put them in you food processor. Put all the other ingredients into the processor, season with salt (if your machine is small, you can always do this in batches and mix them all together in a large bowl), and blitz. What you're looking for is for the chickpeas to get the texture the size of cooked cous cous (kinda grainy, and not very fine). 3. From this mix, form balls slightly smaller than golf balls. If the mix doesn't seem to stick together, blitz for a few more seconds. 4. For storage, you can keep these falafels in a single layer in your Tupperware, and they will keep in your freezer for months. 5. To cook, you can either shallow fry them in a flat, non-stick pan with a little oil, or air-fry them, 180 degrees for around 20 minutes, or until golden and crispy. 6. Eat them hot! Best as just a snack with your favorite condiment, or stuff into some pita bread with some coleslaw.
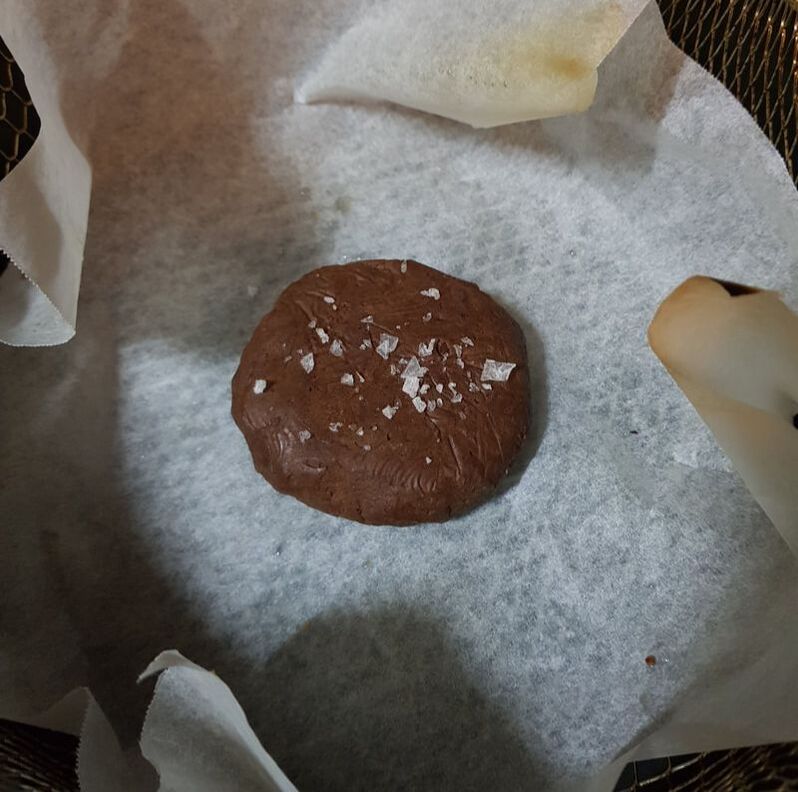
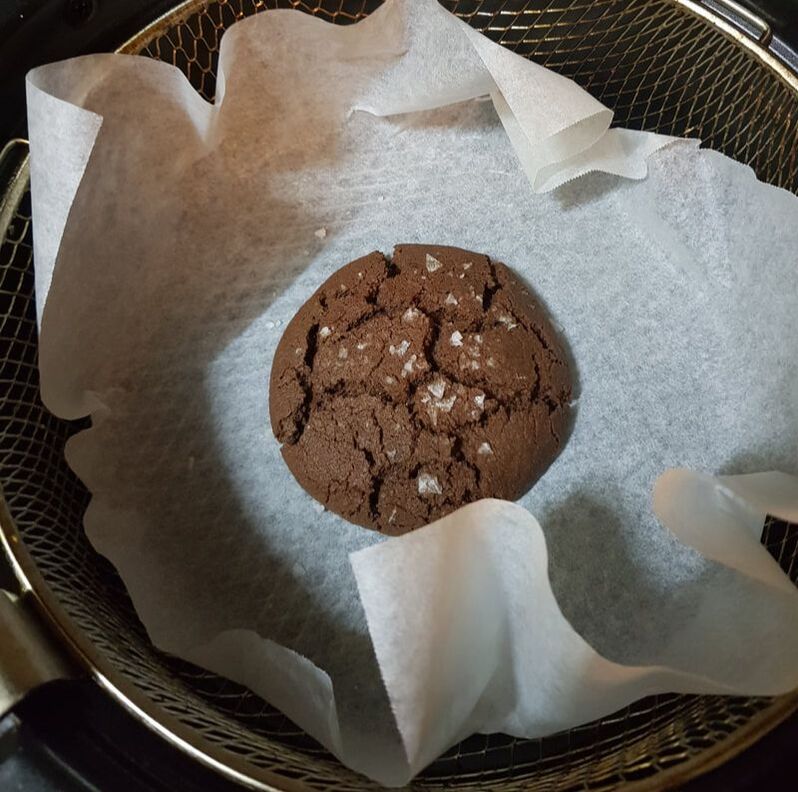
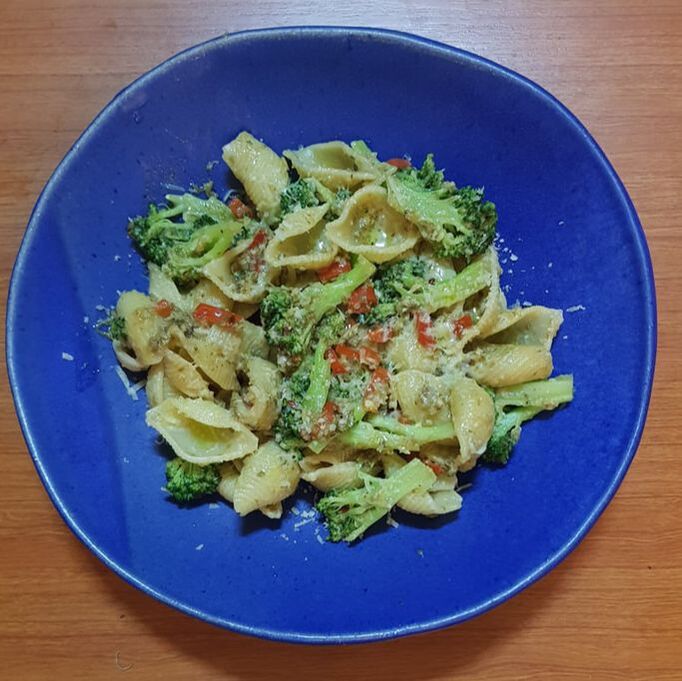 Broccoli OVERLOAD. There's broccoli florets in the dish, and even 'unseen' broccoli in the pesto sauce. And what's even better, this pasta dish utilises almost all aspects of your broccoli, including the stalks (that you always end up throwing out). The anchovies and garlic incorporated will pull the pasta out of bland-town, with chili flakes giving the entire plate an extra kick. Feel free to use any sort of pasta you please, although I find that using orecchiette (pasta shells) is most suitable here because they act as little 'cups' to hold your thick pesto and caramelised cherry tomatoes (if you're using any). This recipe serves 2 or 1 very hungry person (me. Always me.) What You Need: 2 handfuls of broccoli florets 1 handful cherry tomatoes, halved (optional, but I think it adds amazing contrast to the dish) Parmesan cheese For the pesto: 1 floret broccoli, plus the broccoli stalk, trimmed and sliced 3 anchovies in olive oil, plus 1 tsp of its oil 1 tbsp. capers, drained 3 large cloves garlic, peeled A sprinkle of dried chili flakes (OR, however hot you want it to be) What You Do: 1. First, boil your pasta of choice in a pot of salted boiling water according to packet instructions (ProTip: That water should be as salty as the ocean). 2. In your food processor, blitz all the ingredients to make the pesto until you get a paste. 3. In a large flat pan, heat a glug of olive oil, and add the pesto and sautee on low heat. After 3 minutes, add the cherry tomatoes (if using), cooking until they are softened. 4. Add a few spoonfulls of pasta water into the pan, stirring to make a silky sauce with dots of those softened cherry tomatoes. 5. At the last 1 minute of your pasta boiling, chuck in the broccoli florets to blanch them a little. 6. Drain pasta and broccoli (reserve some of the water), and toss them into your sauce. Add a splash of pasta water if it needs it. and grate over some parmesan. You're looking for a silky sauce, draping your pasta nicely. 7. Transfer everything onto a plate, and finish with some grated parmesan, and a dash of extra virgin olive oil. 8. This pasta also goes great with cuts of meat, or a nice carrot salad. 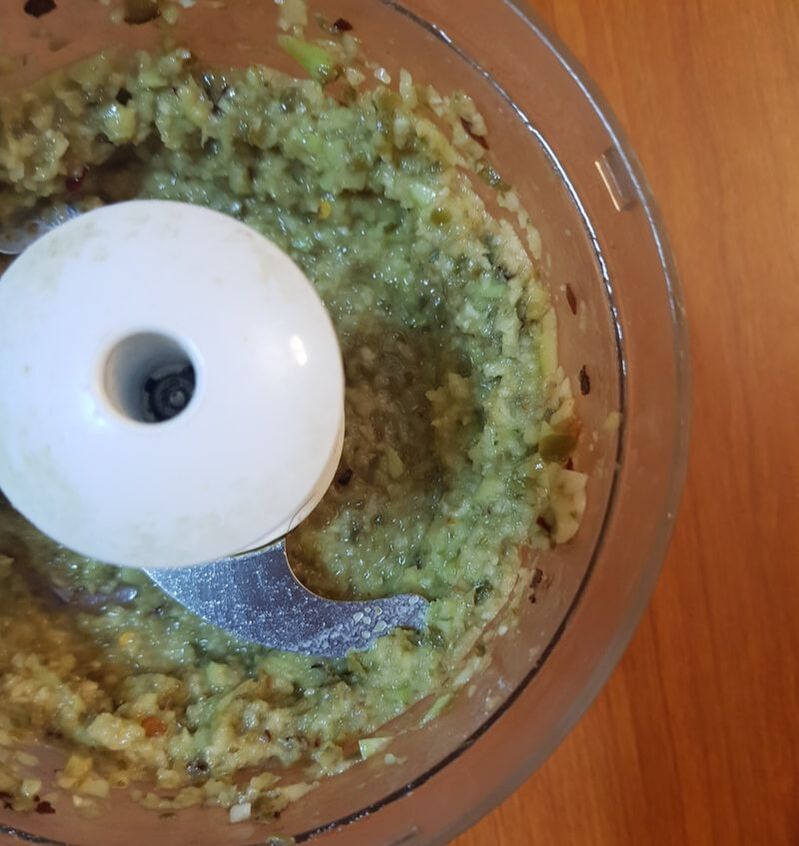 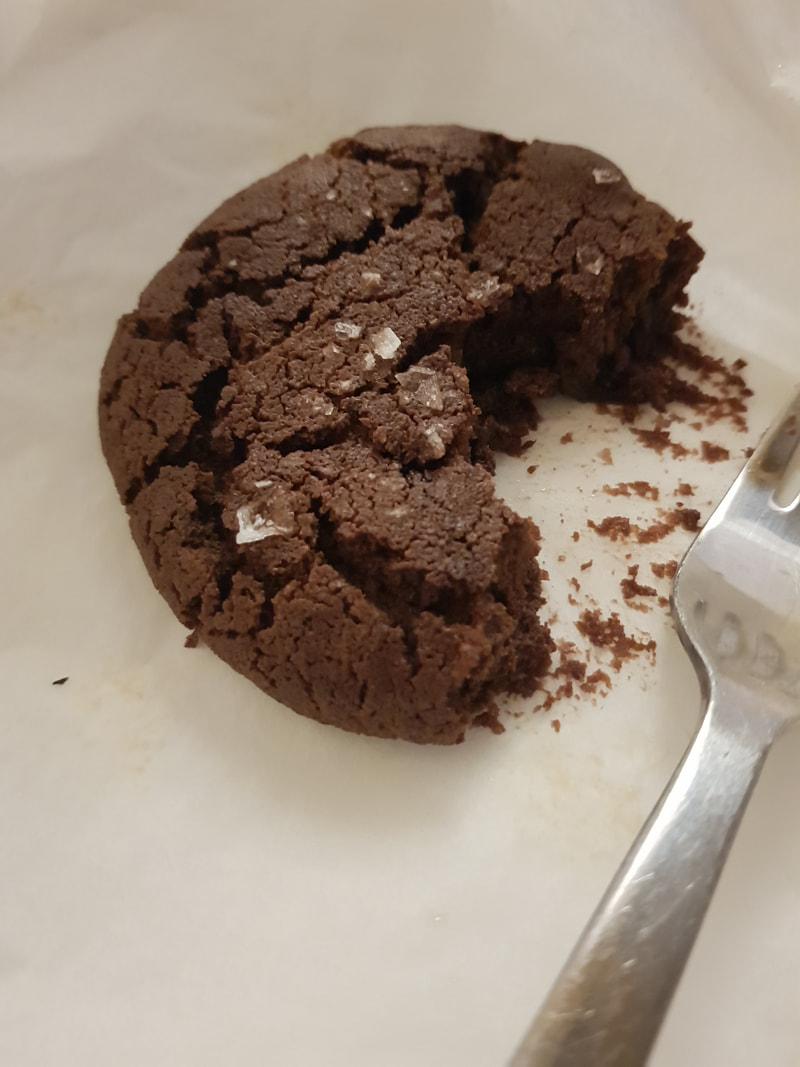 I am your champion of making food for just one or two people. Just because you're not feeding a family of four (or six) does not mean you eat any less fabulously. And when it comes to making cookies, why oh why do all the recipes make a dozen cookies? If you're eating alone, 12 cookies are NOT a good idea. If you keep them for later days, you know they won't be as fresh, and so you end up eating all 12, and that's how you morph into a beach ball... I tried a few runs in making these single-serve cookies. And by single-serve, I mean this recipe will make exactly two medium sized cookies. Perfect for one of those nights when you are craving for a warm, freshly baked cookie that takes only minutes to whip up. Oh, and another good news; you can also make these cookies in an air fryer instead of an oven. You also don't need a mixer. A whisk will do. What You Need: 50 g UNSALTED butter, room temperature 15 g caster sugar (that's about 2 tbsp) 10 g brown sugar (use your relative guesstimation), or gula melaka instead for a nice twist 50 g self raising flour (that's about 1/3 cup, + 1 tbsp) 10 g 100% dark cocoa powder 1/3 tsp sodium bicarbonate 20 g dark chocolate chips (I use Toll House) Some sea salt What You Do: 1. If you are using an oven, preheat oven at 170 degrees. 2. Using a whisk, cream the butter, caster sugar and brown sugar/gula melaka until you get a well-mixed, pale brown consistency. If you don't cream it well, you'll get that weird sugary texture in the cookie that I hate. 3. Mix flour, cocoa powder and bicarb soda in a separate bowl. Add this to the butter mixture. Mix everything with a spatula. DO NOT OVER MIX. You're just getting them all incorporated. 4. Add the chocolate chips. Mix, and make 2 balls out of the dough, flattening them into a shape of a cookie. You can bake both now, or save the other one for later. Just wrap it in clingfilm, and it will last in the fridge for 2 weeks. 5. Line your baking tin, or air fryer, with baking paper. Place cookie, and sprinkle some sea salt on top. You can use any kind, but the best would be Maldon sea salt. 6. Bake in oven for 15 mins, or in air fryer at 180 degrees, 15 mins. 7. It will appear a little too soft at first, but let it cool a little for the edges to set. 8. Try to not eat too quickly because it will burn your tongue (based on my experience).
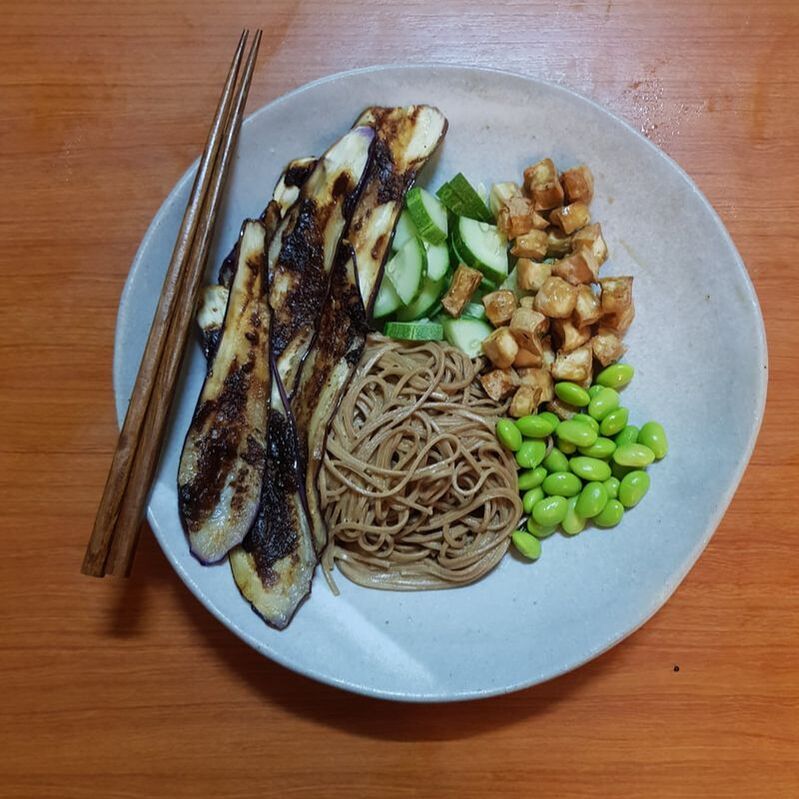 Miso: an ingredient unheard of at grocery stores until recently, and now you can even buy tubs of them online! Miso is basically a type of fermented soy, used widely in Japanese cooking. What it brings is a distinct umami flavour, like a deeper, saltier thickened soy sauce variation. Interested yet? Great! Eggplants are great in carrying miso flavour, as they are a sturdy, meaty vegetable, and hold well against a heavy slathering of miso. And then, we grill them until they are charred and almost blackened, and what you'll get is the silky texture of softened eggplant, with a healthy slap of salty, savoury goodness... Anyway. A compliment to this would then be a portion of springy soba noodles drenched in a creamy sesame sauce, and to offset these textures, some cripsy, air-fried tofu, some edamame, and crunchy, fresh cucumber. Gosh. I love it when healthy stuff doesn't compromise deliciousness. If you need some fire, you can also sprinkle some chopped chilies in this dish. This recipe makes 1 serving. What You Need: 1 long eggplant, sliced into 0.5cm long 1 tbsp miso paste, any variety 1 tbsp olive oil 1 handful soba noodles (more or less. consider a single portion) 1 handful edamame beans, boiled, shelled 1 handful diced cucumber Optional: Sesame seeds, chopped chili, to top dish For the soba dressing; 1 tbsp tahini 2 tbsp olive oil 1 tbsp vinegar (I prefer balsamic) 1 small clove garlic, grated What You Do: 1. Put a grill on high heat. 2. Add miso with olive oil so that it become a runnier paste, and slather one side of the sliced eggplant only. Put the eggplant onto the grill, miso-side up. 3. Cube your tofu, pop them in the air fryer for about 20 mins, 200 deg, or until browned and crsipy. If you don't have an air fryer, shallow fry them in a small pan to get similar results. 4. Meanwhile, prepare the soba dressing. Adjust the ingredients according to taste. You're looking for a creamy and seasoned taste. 5. Boil a pot of water, and pop in your soba noodles. These noodles take very little time to cook, usually around 4-5 mins. Taste it as you go along, make sure it's not overly soggy. Drain. Pour dressing. Toss. 6. After about 5 mins on the grill, flip the eggplant over. Slather this surface with the rest of the miso paste. You may turn them over a few times, and the goal is to get the eggplant cooked, and the miso slightly darkened. They will look ugly. That's ok. They'll taste great though. 7. In a large plate, assemble the soba noodles, cucumber, tofu, edamame and grilled eggplant. 8. That's eat, really. Bon appetit :) 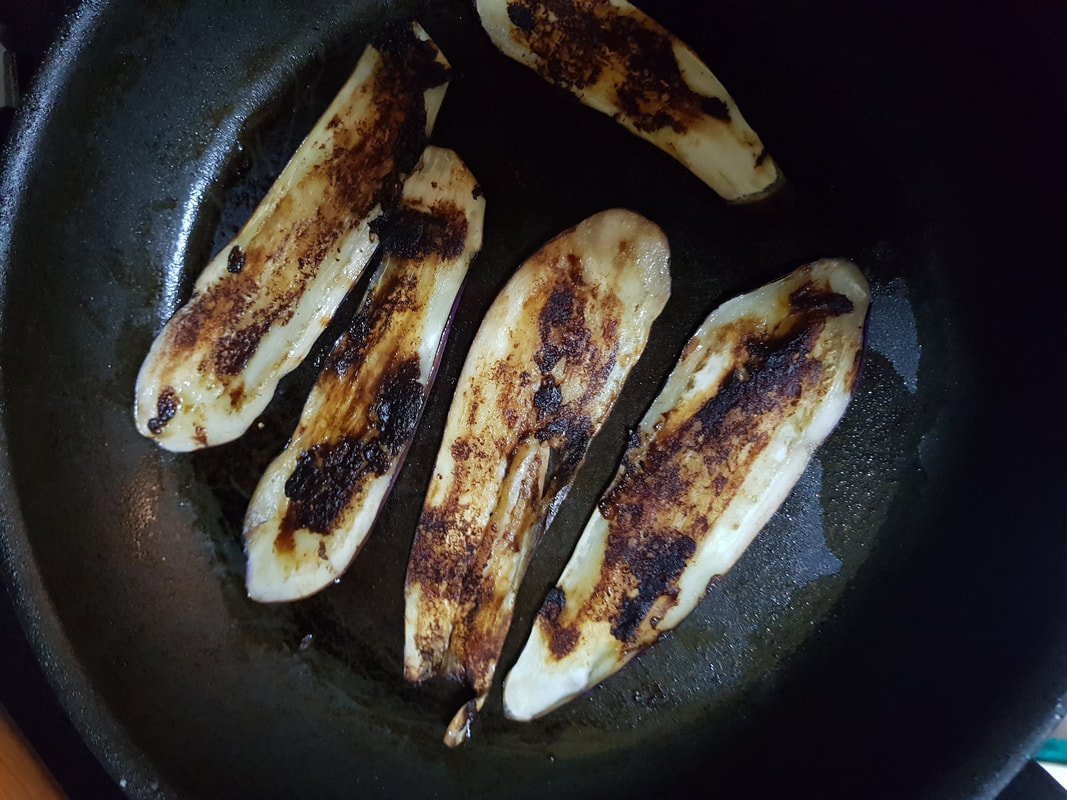 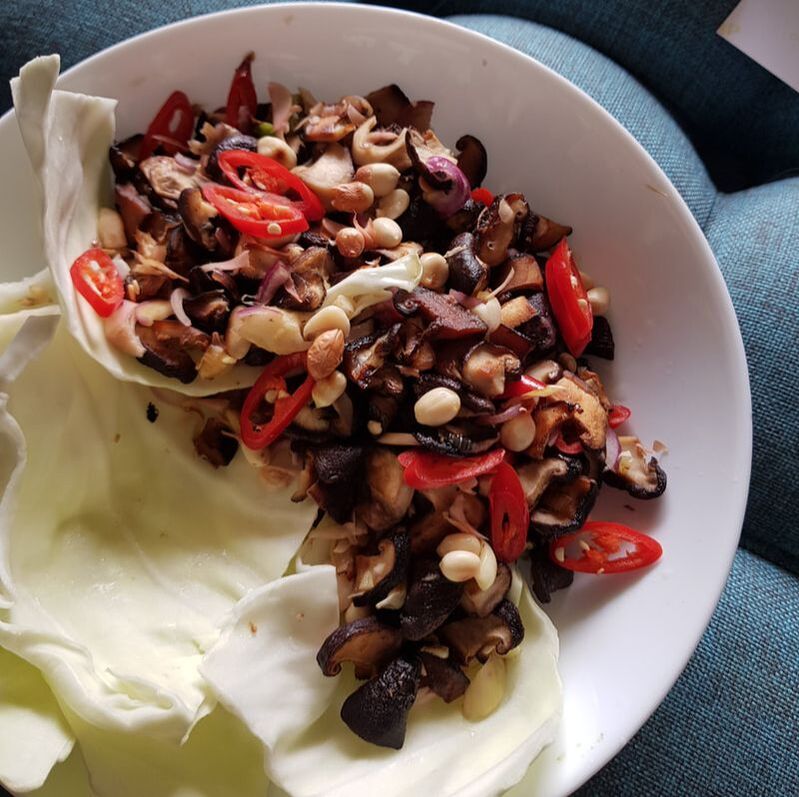 Thai larb is a meat salad variation. It's hot, sour, sharp, everything you'd expect from a rustic Thai dish.
This one is a vegetarian version of a thai larb, using shitake mushrooms as the main ingredient instead. Using mushrooms ensures that the 'meaty' texture is still present, while of course, being a lot lighter. Shitake mushrooms are easy and cheap to find, and for this particular recipe, I'm using the fresh ones instead of dried. Shitake mushrooms are high in vit B5 (hello nice skin/hair!), selenium and zinc, and this meal, together with fresh herbs, peanuts, garlic, and ginger, can only mean good things for you. What You Need: 200 gms shitake mushrooms, cut into dice-sized pieces 1 big clove garlic, peeled and chopped 1/2 inch ginger, grated 1 red chili, sliced thin 1 torch ginger, thinly sliced Some mint or coriander, roughly torn 1 handful toasted peanuts 1 tbsp fish sauce Juice from 1/2 lime Lettuce or cabbage What You Do: 1. Before starting to cook, it helps to get all the ingredients prepped and ready, because this will be fast cooking over fire. 2. In a large flat bottomed pan on low heat, add 2 tbsp cooking oil. Add diced mushrooms, and cook for 4 mins. 3. Add chopped garlic and grated ginger, and half the chili. Toss and cook for a further 2 minutes. 4. Turn off gas. Add the torch ginger, half the peanuts, fish sauce and lime juice. Taste. Adjust according to your tastes. You're looking for a balance of heat, saltiness and sourness. 5. Transfer to a plate, over some cabbage or lettuce leaves. Sprinkle the rest of the chili, peanuts and coriander/mint if using. 6. How to eat: Great on its own in the cabbage/lettuce leaf 'cups' (great for when you're trying to eat healthier!), or as a dish for your rice. |